This is how I have upgraded Rails 2.3.3 to Rails 2.3.4 in Ubuntu 9.04
chee@ibm4linux:~$ sudo gem install rails
[sudo] password for chee:
Successfully installed activesupport-2.3.4
Successfully installed activerecord-2.3.4
Successfully installed actionpack-2.3.4
Successfully installed actionmailer-2.3.4
Successfully installed activeresource-2.3.4
Successfully installed rails-2.3.4
6 gems installed
Installing ri documentation for activesupport-2.3.4...
Installing ri documentation for activerecord-2.3.4...
Installing ri documentation for actionpack-2.3.4...
Installing ri documentation for actionmailer-2.3.4...
Installing ri documentation for activeresource-2.3.4...
Installing ri documentation for rails-2.3.4...
Installing RDoc documentation for activesupport-2.3.4...
Installing RDoc documentation for activerecord-2.3.4...
Installing RDoc documentation for actionpack-2.3.4...
Installing RDoc documentation for actionmailer-2.3.4...
Installing RDoc documentation for activeresource-2.3.4...
Installing RDoc documentation for rails-2.3.4...
Showing posts with label CCH. Show all posts
Showing posts with label CCH. Show all posts
Sunday, September 6, 2009


Rails Basics : link_to
It is an almost Rails convention that you should use Ruby code rather than HTML to create links as a mater of style and flexibility via routes.rb
link_to is an example of a Rails function for html generation and is typically used to add site-wide navigation. For example,
<%= link_to('Home', { :action = 'index'}) %> |
<%= link_to('About Us', { :action ='about'}) %>
You may be interested to note that curly braces are optional in hashes where they are the final argument to a function as follows :-
<%= link_to('About Us',:action ='about') %>
How does one not link to a page that is currently displayed ?
<%= link_to_unless_current('Home', { :action = 'index'}) %> |
<%= link_to_unless_current('About Us', { :action ='about'}) %>
Are there other related link_to functions ?
Rails adheres to a naming convention whereby a group of related functions have related names, usually of the form original_function_name and original_function_name_with_modification
Let's check to the Rails API via the Rails API Tab in Aptana Radrails or at http://api.rubyonrails.org and this is what you should find
link_to is an example of a Rails function for html generation and is typically used to add site-wide navigation. For example,
<%= link_to('Home', { :action = 'index'}) %> |
<%= link_to('About Us', { :action ='about'}) %>
You may be interested to note that curly braces are optional in hashes where they are the final argument to a function as follows :-
<%= link_to('About Us',:action ='about') %>
How does one not link to a page that is currently displayed ?
<%= link_to_unless_current('Home', { :action = 'index'}) %> |
<%= link_to_unless_current('About Us', { :action ='about'}) %>
Are there other related link_to functions ?
Rails adheres to a naming convention whereby a group of related functions have related names, usually of the form original_function_name and original_function_name_with_modification
Let's check to the Rails API via the Rails API Tab in Aptana Radrails or at http://api.rubyonrails.org and this is what you should find
- link_to
- link_to_if
- link_to_remote
- link_to_unless
- link_to_unless_current
<%= link_to image_tag("about.gif", :border=>0), :action => 'about' %>
Wednesday, September 2, 2009
Rail Basics : What happens when you script/generate ?
chee@ibm4linux:~/workspace/crm4test$ script/generate
Usage: script/generate generator [options] [args]
Rails Info:
-v, --version Show the Rails version number and quit.
-h, --help Show this help message and quit.
General Options:
-p, --pretend Run but do not make any changes.
-f, --force Overwrite files that already exist.
-s, --skip Skip files that already exist.
-q, --quiet Suppress normal output.
-t, --backtrace Debugging: show backtrace on errors.
-c, --svn Modify files with subversion. (Note: svn must be in path)
-g, --git Modify files with git. (Note: git must be in path)
Installed Generators
Plugins (vendor/plugins): authenticated, roles
Builtin: controller, helper, integration_test, mailer, metal, migration, model, observer, performance_test, plugin, resource, scaffold, session_migration
More are available at http://wiki.rubyonrails.org/rails/pages/AvailableGenerators
1. Download, for example, login_generator.zip
2. Unzip to directory /home/chee/.rails/generators/login
to use the generator with all your Rails apps
or to /home/chee/workspace/crm4test/lib/generators/login
to use with this app only.
3. Run generate with no arguments for usage information
script/generate login
Generator gems are also available:
1. gem search -r generator
2. gem install login_generator
3. script/generate login
Usage: script/generate generator [options] [args]
Rails Info:
-v, --version Show the Rails version number and quit.
-h, --help Show this help message and quit.
General Options:
-p, --pretend Run but do not make any changes.
-f, --force Overwrite files that already exist.
-s, --skip Skip files that already exist.
-q, --quiet Suppress normal output.
-t, --backtrace Debugging: show backtrace on errors.
-c, --svn Modify files with subversion. (Note: svn must be in path)
-g, --git Modify files with git. (Note: git must be in path)
Installed Generators
Plugins (vendor/plugins): authenticated, roles
Builtin: controller, helper, integration_test, mailer, metal, migration, model, observer, performance_test, plugin, resource, scaffold, session_migration
More are available at http://wiki.rubyonrails.org/rails/pages/AvailableGenerators
1. Download, for example, login_generator.zip
2. Unzip to directory /home/chee/.rails/generators/login
to use the generator with all your Rails apps
or to /home/chee/workspace/crm4test/lib/generators/login
to use with this app only.
3. Run generate with no arguments for usage information
script/generate login
Generator gems are also available:
1. gem search -r generator
2. gem install login_generator
3. script/generate login
Rails Basics : What happens when you script/generate model ?
chee@ibm4linux:~/workspace/crm4test$ script/generate model
Usage: script/generate model ModelName [field:type, field:type]
Options:
--skip-timestamps Don't add timestamps to the migration file for this model
--skip-migration Don't generate a migration file for this model
--skip-fixture Don't generation a fixture file for this model
Rails Info:
-v, --version Show the Rails version number and quit.
-h, --help Show this help message and quit.
General Options:
-p, --pretend Run but do not make any changes.
-f, --force Overwrite files that already exist.
-s, --skip Skip files that already exist.
-q, --quiet Suppress normal output.
-t, --backtrace Debugging: show backtrace on errors.
-c, --svn Modify files with subversion. (Note: svn must be in path)
-g, --git Modify files with git. (Note: git must be in path)
Description:
Stubs out a new model. Pass the model name, either CamelCased or
under_scored, and an optional list of attribute pairs as arguments.
Attribute pairs are column_name:sql_type arguments specifying the
model's attributes. Timestamps are added by default, so you don't have to
specify them by hand as 'created_at:datetime updated_at:datetime'.
You don't have to think up every attribute up front, but it helps to
sketch out a few so you can start working with the model immediately.
This generates a model class in app/models, a unit test in test/unit,
a test fixture in test/fixtures/singular_name.yml, and a migration in
db/migrate.
Examples:
`./script/generate model account`
creates an Account model, test, fixture, and migration:
Model: app/models/account.rb
Test: test/unit/account_test.rb
Fixtures: test/fixtures/accounts.yml
Migration: db/migrate/XXX_add_accounts.rb
`./script/generate model post title:string body:text published:boolean`
creates a Post model with a string title, text body, and published flag.
Usage: script/generate model ModelName [field:type, field:type]
Options:
--skip-timestamps Don't add timestamps to the migration file for this model
--skip-migration Don't generate a migration file for this model
--skip-fixture Don't generation a fixture file for this model
Rails Info:
-v, --version Show the Rails version number and quit.
-h, --help Show this help message and quit.
General Options:
-p, --pretend Run but do not make any changes.
-f, --force Overwrite files that already exist.
-s, --skip Skip files that already exist.
-q, --quiet Suppress normal output.
-t, --backtrace Debugging: show backtrace on errors.
-c, --svn Modify files with subversion. (Note: svn must be in path)
-g, --git Modify files with git. (Note: git must be in path)
Description:
Stubs out a new model. Pass the model name, either CamelCased or
under_scored, and an optional list of attribute pairs as arguments.
Attribute pairs are column_name:sql_type arguments specifying the
model's attributes. Timestamps are added by default, so you don't have to
specify them by hand as 'created_at:datetime updated_at:datetime'.
You don't have to think up every attribute up front, but it helps to
sketch out a few so you can start working with the model immediately.
This generates a model class in app/models, a unit test in test/unit,
a test fixture in test/fixtures/singular_name.yml, and a migration in
db/migrate.
Examples:
`./script/generate model account`
creates an Account model, test, fixture, and migration:
Model: app/models/account.rb
Test: test/unit/account_test.rb
Fixtures: test/fixtures/accounts.yml
Migration: db/migrate/XXX_add_accounts.rb
`./script/generate model post title:string body:text published:boolean`
creates a Post model with a string title, text body, and published flag.
Monday, August 31, 2009
Rails Plugins : How to Install role_requirement ?
Step 1 - Grab role_requirement form github.com
chee@ibm4linux:~/workspace/crm4test$ script/plugin install git://github.com/timcharper/role_requirement.git
Result
Initialized empty Git repository in /home/chee/workspace/crm4test/vendor/plugins/role_requirement/.git/
remote: Counting objects: 32, done.
remote: Compressing objects: 100% (30/30), done.
remote: Total 32 (delta 3), reused 10 (delta 0)
Unpacking objects: 100% (32/32), done.
From git://github.com/timcharper/role_requirement
* branch HEAD -> FETCH_HEAD
Step 2 - Run the generator
chee@ibm4linux:~/workspace/crm4test$ script/generate roles Role User
Generating Role against User
Added the following to the top of app/models/user.rb:
# ---------------------------------------
# The following code has been generated by role_requirement.
# You may wish to modify it to suit your need
has_and_belongs_to_many :roles
# has_role? simply needs to return true or false whether a user has a role or not.
# It may be a good idea to have "admin" roles return true always
def has_role?(role_in_question)
@_list ||= self.roles.collect(&:name)
return true if @_list.include?("admin")
(@_list.include?(role_in_question.to_s) )
end
# ---------------------------------------
Added ApplicationController include to /home/chee/workspace/crm4test/app/controllers/application_controller.rb
Added RoleRequirement include to /home/chee/workspace/crm4test/app/controllers/application_controller.rb
create test/fixtures/roles.yml
create app/models/role.rb
create lib/role_requirement_system.rb
create lib/role_requirement_test_helper.rb
create lib/hijacker.rb
exists db/migrate
create db/migrate/20090831042625_create_roles.rb
Step 3 - rake db:migrate
chee@ibm4linux:~/workspace/crm4test$ rake db:migrate
(in /home/chee/workspace/crm4test)
== CreateRoles: migrating ====================================================
-- create_table("roles")
-> 0.0037s
-- create_table("roles_users", {:id=>false})
-> 0.0027s
-- add_index("roles_users", "role_id")
-> 0.0122s
-- add_index("roles_users", "user_id")
-> 0.0016s
== CreateRoles: migrated (0.0229s) ===========================================
chee@ibm4linux:~/workspace/crm4test$ script/plugin install git://github.com/timcharper/role_requirement.git
Result
Initialized empty Git repository in /home/chee/workspace/crm4test/vendor/plugins/role_requirement/.git/
remote: Counting objects: 32, done.
remote: Compressing objects: 100% (30/30), done.
remote: Total 32 (delta 3), reused 10 (delta 0)
Unpacking objects: 100% (32/32), done.
From git://github.com/timcharper/role_requirement
* branch HEAD -> FETCH_HEAD
Step 2 - Run the generator
chee@ibm4linux:~/workspace/crm4test$ script/generate roles Role User
Generating Role against User
Added the following to the top of app/models/user.rb:
# ---------------------------------------
# The following code has been generated by role_requirement.
# You may wish to modify it to suit your need
has_and_belongs_to_many :roles
# has_role? simply needs to return true or false whether a user has a role or not.
# It may be a good idea to have "admin" roles return true always
def has_role?(role_in_question)
@_list ||= self.roles.collect(&:name)
return true if @_list.include?("admin")
(@_list.include?(role_in_question.to_s) )
end
# ---------------------------------------
Added ApplicationController include to /home/chee/workspace/crm4test/app/controllers/application_controller.rb
Added RoleRequirement include to /home/chee/workspace/crm4test/app/controllers/application_controller.rb
create test/fixtures/roles.yml
create app/models/role.rb
create lib/role_requirement_system.rb
create lib/role_requirement_test_helper.rb
create lib/hijacker.rb
exists db/migrate
create db/migrate/20090831042625_create_roles.rb
Step 3 - rake db:migrate
chee@ibm4linux:~/workspace/crm4test$ rake db:migrate
(in /home/chee/workspace/crm4test)
== CreateRoles: migrating ====================================================
-- create_table("roles")
-> 0.0037s
-- create_table("roles_users", {:id=>false})
-> 0.0027s
-- add_index("roles_users", "role_id")
-> 0.0122s
-- add_index("roles_users", "user_id")
-> 0.0016s
== CreateRoles: migrated (0.0229s) ===========================================
What does the Generators do ?
- Only if many roles are used:
- Generates habtm table, creates role.rb with the habtm declaration. Adds declaration in user.rb (scans the code for "class User < ActiveRecord::Base", and puts the new code right after it.
- Creates an admin user in users.yml, with a role named admin in roles.yml, including a fixture to demonstrate how to relate roles to users in roles_users.yml
- Modify the user.rb (or corresponding user model) file, add the instance method has_role?
- Generates RoleRequirementSystem against for the corresponding user model.
- Generates a migration to make the necessary database changes
- Scans ApplicationController, inserts the lines "include AuthenticatedSystem", and "include RoleRequirementSystem", if not already included.
- Scans test_helper.rb and adds "includes RoleRequirementTestHelpers", if not already included.
Rails Plugins : How to Install restful_authentication ?
To use role_requirement, the prerequisite is to install the restful_authentication plugin. These are the 3 steps that I took to achieve a succesful installation.
Step 1 - Grab the plugin from github.com
chee@ibm4linux:~/workspace/crm4test$ script/plugin install git://github.com/technoweenie/restful-authentication.git
Result
Initialized empty Git repository in /home/chee/workspace/crm4test/vendor/plugins/restful-authentication/.git/
remote: Counting objects: 89, done.
remote: Compressing objects: 100% (77/77), done.
remote: Total 89 (delta 5), reused 31 (delta 2)
Unpacking objects: 100% (89/89), done.
From git://github.com/technoweenie/restful-authentication
* branch HEAD -> FETCH_HEAD
Step 2 - Generate user and sessions controllers
chee@ibm4linux:~/workspace/crm4test$ script/generate authenticated user sessions
This is what you will see in the command line editor (in Ubuntu 9.04, a Gnome Terminal Window)
Ready to generate.
----------------------------------------------------------------------
Once finished, don't forget to:
- Add routes to these resources. In config/routes.rb, insert routes like:
map.signup '/signup', :controller => 'users', :action => 'new'
map.login '/login', :controller => 'sessions', :action => 'new'
map.logout '/logout', :controller => 'sessions', :action => 'destroy'
CCH : No need to do so as the latest version automatically includes these routes to routes.rb
----------------------------------------------------------------------
We've create a new site key in config/initializers/site_keys.rb. If you have existing
user accounts their passwords will no longer work (see README). As always,
keep this file safe but don't post it in public.
----------------------------------------------------------------------
exists app/models/
exists app/controllers/
exists app/controllers/
exists app/helpers/
create app/views/sessions
exists app/controllers/
exists app/helpers/
create app/views/users
exists config/initializers
exists test/functional/
exists test/functional/
exists test/unit/
exists test/fixtures/
create app/models/user.rb
create app/controllers/sessions_controller.rb
create app/controllers/users_controller.rb
create lib/authenticated_system.rb
create lib/authenticated_test_helper.rb
create config/initializers/site_keys.rb
create test/functional/sessions_controller_test.rb
create test/functional/users_controller_test.rb
create test/unit/user_test.rb
create test/fixtures/users.yml
create app/helpers/sessions_helper.rb
create app/helpers/users_helper.rb
create app/views/sessions/new.html.erb
create app/views/users/new.html.erb
create app/views/users/_user_bar.html.erb
exists db/migrate
create db/migrate/20090831032706_create_users.rb
route map.resource :session
route map.resources :users
route map.signup '/signup', :controller => 'users', :action => 'new'
route map.register '/register', :controller => 'users', :action => 'create'
route map.login '/login', :controller => 'sessions', :action => 'new'
route map.logout '/logout', :controller => 'sessions', :action => 'destroy'
Step 3 - Modify the Project Database
chee@ibm4linux:~/workspace/crm4test$ rake db:migrate
(in /home/chee/workspace/crm4test)
== CreateUsers: migrating ====================================================
-- create_table("users", {:force=>true})
-> 0.0074s
-- add_index(:users, :login, {:unique=>true})
-> 0.0374s
== CreateUsers: migrated (0.0464s) ===========================================
You may be interested to look at the contents of the migration file as follows :-
class CreateUsers < ActiveRecord::Migration
def self.up
create_table "users", :force => true do |t|
t.column :login, :string, :limit => 40
t.column :name, :string, :limit => 100, :default => '', :null => true
t.column :email, :string, :limit => 100
t.column :crypted_password, :string, :limit => 40
t.column :salt, :string, :limit => 40
t.column :created_at, :datetime
t.column :updated_at, :datetime
t.column :remember_token, :string, :limit => 40
t.column :remember_token_expires_at, :datetime
end
add_index :users, :login, :unique => true
end
def self.down
drop_table "users"
end
end
The Generated User & Sessions Controllers
User.rb
class UsersController < ApplicationController
# Be sure to include AuthenticationSystem in Application Controller instead
include AuthenticatedSystem
# render new.rhtml
def new
@user = User.new
end
def create
logout_keeping_session!
@user = User.new(params[:user])
success = @user && @user.save
if success && @user.errors.empty?
# Protects against session fixation attacks, causes request forgery
# protection if visitor resubmits an earlier form using back
# button. Uncomment if you understand the tradeoffs.
# reset session
self.current_user = @user # !! now logged in
redirect_back_or_default('/')
flash[:notice] = "Thanks for signing up! We're sending you an email with your activation code."
else
flash[:error] = "We couldn't set up that account, sorry. Please try again, or contact an admin (link is above)."
render :action => 'new'
end
end
end
sessions.rb
# This controller handles the login/logout function of the site.
class SessionsController < ApplicationController
# Be sure to include AuthenticationSystem in Application Controller instead
include AuthenticatedSystem
# render new.rhtml
def new
end
def create
logout_keeping_session!
user = User.authenticate(params[:login], params[:password])
if user
# Protects against session fixation attacks, causes request forgery
# protection if user resubmits an earlier form using back
# button. Uncomment if you understand the tradeoffs.
# reset_session
self.current_user = user
new_cookie_flag = (params[:remember_me] == "1")
handle_remember_cookie! new_cookie_flag
redirect_back_or_default('/')
flash[:notice] = "Logged in successfully"
else
note_failed_signin
@login = params[:login]
@remember_me = params[:remember_me]
render :action => 'new'
end
end
def destroy
logout_killing_session!
flash[:notice] = "You have been logged out."
redirect_back_or_default('/')
end
protected
# Track failed login attempts
def note_failed_signin
flash[:error] = "Couldn't log you in as '#{params[:login]}'"
logger.warn "Failed login for '#{params[:login]}' from #{request.remote_ip} at #{Time.now.utc}"
end
end
Step 1 - Grab the plugin from github.com
chee@ibm4linux:~/workspace/crm4test$ script/plugin install git://github.com/technoweenie/restful-authentication.git
Result
Initialized empty Git repository in /home/chee/workspace/crm4test/vendor/plugins/restful-authentication/.git/
remote: Counting objects: 89, done.
remote: Compressing objects: 100% (77/77), done.
remote: Total 89 (delta 5), reused 31 (delta 2)
Unpacking objects: 100% (89/89), done.
From git://github.com/technoweenie/restful-authentication
* branch HEAD -> FETCH_HEAD
Step 2 - Generate user and sessions controllers
chee@ibm4linux:~/workspace/crm4test$ script/generate authenticated user sessions
This is what you will see in the command line editor (in Ubuntu 9.04, a Gnome Terminal Window)
Ready to generate.
----------------------------------------------------------------------
Once finished, don't forget to:
- Add routes to these resources. In config/routes.rb, insert routes like:
map.signup '/signup', :controller => 'users', :action => 'new'
map.login '/login', :controller => 'sessions', :action => 'new'
map.logout '/logout', :controller => 'sessions', :action => 'destroy'
CCH : No need to do so as the latest version automatically includes these routes to routes.rb
----------------------------------------------------------------------
We've create a new site key in config/initializers/site_keys.rb. If you have existing
user accounts their passwords will no longer work (see README). As always,
keep this file safe but don't post it in public.
----------------------------------------------------------------------
exists app/models/
exists app/controllers/
exists app/controllers/
exists app/helpers/
create app/views/sessions
exists app/controllers/
exists app/helpers/
create app/views/users
exists config/initializers
exists test/functional/
exists test/functional/
exists test/unit/
exists test/fixtures/
create app/models/user.rb
create app/controllers/sessions_controller.rb
create app/controllers/users_controller.rb
create lib/authenticated_system.rb
create lib/authenticated_test_helper.rb
create config/initializers/site_keys.rb
create test/functional/sessions_controller_test.rb
create test/functional/users_controller_test.rb
create test/unit/user_test.rb
create test/fixtures/users.yml
create app/helpers/sessions_helper.rb
create app/helpers/users_helper.rb
create app/views/sessions/new.html.erb
create app/views/users/new.html.erb
create app/views/users/_user_bar.html.erb
exists db/migrate
create db/migrate/20090831032706_create_users.rb
route map.resource :session
route map.resources :users
route map.signup '/signup', :controller => 'users', :action => 'new'
route map.register '/register', :controller => 'users', :action => 'create'
route map.login '/login', :controller => 'sessions', :action => 'new'
route map.logout '/logout', :controller => 'sessions', :action => 'destroy'
Step 3 - Modify the Project Database
chee@ibm4linux:~/workspace/crm4test$ rake db:migrate
(in /home/chee/workspace/crm4test)
== CreateUsers: migrating ====================================================
-- create_table("users", {:force=>true})
-> 0.0074s
-- add_index(:users, :login, {:unique=>true})
-> 0.0374s
== CreateUsers: migrated (0.0464s) ===========================================
You may be interested to look at the contents of the migration file as follows :-
class CreateUsers < ActiveRecord::Migration
def self.up
create_table "users", :force => true do |t|
t.column :login, :string, :limit => 40
t.column :name, :string, :limit => 100, :default => '', :null => true
t.column :email, :string, :limit => 100
t.column :crypted_password, :string, :limit => 40
t.column :salt, :string, :limit => 40
t.column :created_at, :datetime
t.column :updated_at, :datetime
t.column :remember_token, :string, :limit => 40
t.column :remember_token_expires_at, :datetime
end
add_index :users, :login, :unique => true
end
def self.down
drop_table "users"
end
end
The Generated User & Sessions Controllers
User.rb
class UsersController < ApplicationController
# Be sure to include AuthenticationSystem in Application Controller instead
include AuthenticatedSystem
# render new.rhtml
def new
@user = User.new
end
def create
logout_keeping_session!
@user = User.new(params[:user])
success = @user && @user.save
if success && @user.errors.empty?
# Protects against session fixation attacks, causes request forgery
# protection if visitor resubmits an earlier form using back
# button. Uncomment if you understand the tradeoffs.
# reset session
self.current_user = @user # !! now logged in
redirect_back_or_default('/')
flash[:notice] = "Thanks for signing up! We're sending you an email with your activation code."
else
flash[:error] = "We couldn't set up that account, sorry. Please try again, or contact an admin (link is above)."
render :action => 'new'
end
end
end
sessions.rb
# This controller handles the login/logout function of the site.
class SessionsController < ApplicationController
# Be sure to include AuthenticationSystem in Application Controller instead
include AuthenticatedSystem
# render new.rhtml
def new
end
def create
logout_keeping_session!
user = User.authenticate(params[:login], params[:password])
if user
# Protects against session fixation attacks, causes request forgery
# protection if user resubmits an earlier form using back
# button. Uncomment if you understand the tradeoffs.
# reset_session
self.current_user = user
new_cookie_flag = (params[:remember_me] == "1")
handle_remember_cookie! new_cookie_flag
redirect_back_or_default('/')
flash[:notice] = "Logged in successfully"
else
note_failed_signin
@login = params[:login]
@remember_me = params[:remember_me]
render :action => 'new'
end
end
def destroy
logout_killing_session!
flash[:notice] = "You have been logged out."
redirect_back_or_default('/')
end
protected
# Track failed login attempts
def note_failed_signin
flash[:error] = "Couldn't log you in as '#{params[:login]}'"
logger.warn "Failed login for '#{params[:login]}' from #{request.remote_ip} at #{Time.now.utc}"
end
end
Sunday, August 30, 2009
Rail Basics : What happens when you script/generate controller ?
What do you think will happen if you script/generate controller ?
Why wonder, just do it :-)
If you are using Ubuntu 9.04, just open a Terminal Window and cd to the root of your Rails applications and type script/generate controller -- as follows :-
chee@ibm4linux:~/workspace/crm2009$ script/generate controller
After pressing Enter, this is what you will see.
Usage: script/generate controller ControllerName [options]
Rails Info:
-v, --version Show the Rails version number and quit.
-h, --help Show this help message and quit.
General Options:
-p, --pretend Run but do not make any changes.
-f, --force Overwrite files that already exist.
-s, --skip Skip files that already exist.
-q, --quiet Suppress normal output.
-t, --backtrace Debugging: show backtrace on errors.
-c, --svn Modify files with subversion. (Note: svn must be in path)
-g, --git Modify files with git. (Note: git must be in path)
Description:
Stubs out a new controller and its views. Pass the controller name, either
CamelCased or under_scored, and a list of views as arguments.
To create a controller within a module, specify the controller name as a
path like 'parent_module/controller_name'.
This generates a controller class in app/controllers, view templates in
app/views/controller_name, a helper class in app/helpers, a functional
test suite in test/functional and a helper test suite in test/unit/helpers.
Example:
`./script/generate controller CreditCard open debit credit close`
Credit card controller with URLs like /credit_card/debit.
Controller: app/controllers/credit_card_controller.rb
Functional Test: test/functional/credit_card_controller_test.rb
Views: app/views/credit_card/debit.html.erb [...]
Helper: app/helpers/credit_card_helper.rb
Helper Test: test/unit/helpers/credit_card_helper_test.rb
Modules Example:
`./script/generate controller 'admin/credit_card' suspend late_fee`
Credit card admin controller with URLs /admin/credit_card/suspend.
Controller: app/controllers/admin/credit_card_controller.rb
Functional Test: test/functional/admin/credit_card_controller_test.rb
Views: app/views/admin/credit_card/debit.html.erb [...]
Helper: app/helpers/admin/credit_card_helper.rb
Helper Test: test/unit/helpers/admin/credit_card_helper_test.rb
Why wonder, just do it :-)
If you are using Ubuntu 9.04, just open a Terminal Window and cd to the root of your Rails applications and type script/generate controller -- as follows :-
chee@ibm4linux:~/workspace/crm2009$ script/generate controller
After pressing Enter, this is what you will see.
Usage: script/generate controller ControllerName [options]
Rails Info:
-v, --version Show the Rails version number and quit.
-h, --help Show this help message and quit.
General Options:
-p, --pretend Run but do not make any changes.
-f, --force Overwrite files that already exist.
-s, --skip Skip files that already exist.
-q, --quiet Suppress normal output.
-t, --backtrace Debugging: show backtrace on errors.
-c, --svn Modify files with subversion. (Note: svn must be in path)
-g, --git Modify files with git. (Note: git must be in path)
Description:
Stubs out a new controller and its views. Pass the controller name, either
CamelCased or under_scored, and a list of views as arguments.
To create a controller within a module, specify the controller name as a
path like 'parent_module/controller_name'.
This generates a controller class in app/controllers, view templates in
app/views/controller_name, a helper class in app/helpers, a functional
test suite in test/functional and a helper test suite in test/unit/helpers.
Example:
`./script/generate controller CreditCard open debit credit close`
Credit card controller with URLs like /credit_card/debit.
Controller: app/controllers/credit_card_controller.rb
Functional Test: test/functional/credit_card_controller_test.rb
Views: app/views/credit_card/debit.html.erb [...]
Helper: app/helpers/credit_card_helper.rb
Helper Test: test/unit/helpers/credit_card_helper_test.rb
Modules Example:
`./script/generate controller 'admin/credit_card' suspend late_fee`
Credit card admin controller with URLs /admin/credit_card/suspend.
Controller: app/controllers/admin/credit_card_controller.rb
Functional Test: test/functional/admin/credit_card_controller_test.rb
Views: app/views/admin/credit_card/debit.html.erb [...]
Helper: app/helpers/admin/credit_card_helper.rb
Helper Test: test/unit/helpers/admin/credit_card_helper_test.rb
Rails Basics : How to Install a Plugin from the Command Line ?
Although Aptana Radrails and other Rails IDE usually have a Rails Plugin Tab or its equivalent, I personally feel that it easier and more flexible to do so using the Command Line.
To do so in Ubuntu 9.04, click Applications/Accessories/Terminal to open a terminal window and cd to the root of your Rails Project as follows :-
chee@ibm4linux:~$ cd workspace
chee@ibm4linux:~/workspace$ cd crm2009
chee@ibm4linux:~/workspace/crm2009$ script/plugin install
To discover the various options available in script/plugin
chee@ibm4linux:~/workspace/crm2009$ script/plugin --
Unknown command:
Usage: plugin [OPTIONS] command
Rails plugin manager.
GENERAL OPTIONS
-r, --root=DIR Set an explicit rails app directory.
Default: /home/chee/workspace/crm2009
-s, --source=URL1,URL2 Use the specified plugin repositories instead of the defaults.
-v, --verbose Turn on verbose output.
-h, --help Show this help message.
COMMANDS
discover Discover plugin repositories.
list List available plugins.
install Install plugin(s) from known repositories or URLs.
update Update installed plugins.
remove Uninstall plugins.
source Add a plugin source repository.
unsource Remove a plugin repository.
sources List currently configured plugin repositories.
EXAMPLES
Install a plugin:
plugin install continuous_builder
Install a plugin from a subversion URL:
plugin install http://dev.rubyonrails.com/svn/rails/plugins/continuous_builder
Install a plugin from a git URL:
plugin install git://github.com/SomeGuy/my_awesome_plugin.git
Install a plugin and add a svn:externals entry to vendor/plugins
plugin install -x continuous_builder
List all available plugins:
plugin list
List plugins in the specified repository:
plugin list --source=http://dev.rubyonrails.com/svn/rails/plugins/
Discover and prompt to add new repositories:
plugin discover
Discover new repositories but just list them, don't add anything:
plugin discover -l
Add a new repository to the source list:
plugin source http://dev.rubyonrails.com/svn/rails/plugins/
Remove a repository from the source list:
plugin unsource http://dev.rubyonrails.com/svn/rails/plugins/
Show currently configured repositories:
plugin sources
To do so in Ubuntu 9.04, click Applications/Accessories/Terminal to open a terminal window and cd to the root of your Rails Project as follows :-
chee@ibm4linux:~$ cd workspace
chee@ibm4linux:~/workspace$ cd crm2009
chee@ibm4linux:~/workspace/crm2009$ script/plugin install
To discover the various options available in script/plugin
chee@ibm4linux:~/workspace/crm2009$ script/plugin --
Unknown command:
Usage: plugin [OPTIONS] command
Rails plugin manager.
GENERAL OPTIONS
-r, --root=DIR Set an explicit rails app directory.
Default: /home/chee/workspace/crm2009
-s, --source=URL1,URL2 Use the specified plugin repositories instead of the defaults.
-v, --verbose Turn on verbose output.
-h, --help Show this help message.
COMMANDS
discover Discover plugin repositories.
list List available plugins.
install Install plugin(s) from known repositories or URLs.
update Update installed plugins.
remove Uninstall plugins.
source Add a plugin source repository.
unsource Remove a plugin repository.
sources List currently configured plugin repositories.
EXAMPLES
Install a plugin:
plugin install continuous_builder
Install a plugin from a subversion URL:
plugin install http://dev.rubyonrails.com/svn/rails/plugins/continuous_builder
Install a plugin from a git URL:
plugin install git://github.com/SomeGuy/my_awesome_plugin.git
Install a plugin and add a svn:externals entry to vendor/plugins
plugin install -x continuous_builder
List all available plugins:
plugin list
List plugins in the specified repository:
plugin list --source=http://dev.rubyonrails.com/svn/rails/plugins/
Discover and prompt to add new repositories:
plugin discover
Discover new repositories but just list them, don't add anything:
plugin discover -l
Add a new repository to the source list:
plugin source http://dev.rubyonrails.com/svn/rails/plugins/
Remove a repository from the source list:
plugin unsource http://dev.rubyonrails.com/svn/rails/plugins/
Show currently configured repositories:
plugin sources
Saturday, August 29, 2009
Rails Basics : What is a Model ?
What is a Model ?
The Model is the 'M' in the MVC (Model/Views/Controller) concept integral to a Rails application.
Models should :-
Conventions for Models
Model classes in Rails are all inherited from the ActiveRecord base class ActiveRecord::Base and map one-to-one to a table in your database.
Residing in the app/models directory, Models should following the following convention :-
More to come...
The Model is the 'M' in the MVC (Model/Views/Controller) concept integral to a Rails application.
Models should :-
- Constitute most of your application codes.
- Provide a persistent storage mechanism to your database
- Define all business logic
Conventions for Models
Model classes in Rails are all inherited from the ActiveRecord base class ActiveRecord::Base and map one-to-one to a table in your database.
Residing in the app/models directory, Models should following the following convention :-
- Only one class per file
- Class name should be singular and camel-cased eg.Customer or BillNo
- Corresponding table name should be lowercased, plural and underscored eg. customers or bill_nos
- Corresponding table must have an auto-incrementing integer field called id
- Column names shoudl also be lowercased
- Model filename should be lowercased and underscored version of the class name eg. customer.rb or bill_no.rb
- has_many represents a zero-to-many relationship between the Parent & Child Class
- belongs_to is the reciprocal child method to parent has_many method
- has_one is like a belongs_to and represents a one-to-one relationship in your database
More to come...
Friday, August 28, 2009
Rails Basics : What is a Controller ?
What is a Controller ?
The Controller is an integral component of the MVC (Model/View/Controller) concept that is central to Rails. Controllers are normal Ruby classes that inherit from ActionController:Base or more frequently the generated ApplicationController Class
Controllers have public action methods that can be called from the dispatcher as well as their own protected and private methods. Typically, action methods follow this pattern :-
As such, you should remove all Business Logic from your Controllers and put in the corresponding Model.
So what does the Controllers in your Rails application do ?
Well, your controllers are only responsible for mapping between URLs, co-ordinating with your Models and your Views and channeling back to a HTTP response. In addition, it may do Access Control as well.
Basically, when someone connects to your Rails Application via an URL, they are ly asking your Application to execute a Controller Action. Typically, action methods follow this pattern :-
As you may be aware, Rails works magically so long as you adhere to the all important concepl of Convention over Configuration. In this respect Controller Conventions include :-
a) The Controller's class name should be camel cased and pluralised and be followed by the word controller. eg.CustomersControllers or BillNosControllers
b) Similar to Models, the controller filename should be lowercased and underscored versions of the class name. eg. customers_controllers.rb or bill_nos_controllers.rb
c) An action is a Public Method of a controller class. For example
What is fascinating is that unless explicitly told to do , Rails will render the views with the same name as the actions!
How to remove a controller and all previously generated files ?
chee@ibm4linux:~/workspace/crm2009$ script/destroy controller concepts
rm test/unit/helpers/concepts_helper_test.rb
rm app/helpers/concepts_helper.rb
rm test/functional/concepts_controller_test.rb
rm app/controllers/concepts_controller.rb
notempty test/unit/helpers
notempty test/unit
notempty test
notempty test/functional
notempty test
rmdir app/views/concepts
notempty app/views
notempty app
notempty app/helpers
notempty app
notempty app/controllers
notempty app
chee@ibm4linux:~/workspace/crm2009$
The Controller is an integral component of the MVC (Model/View/Controller) concept that is central to Rails. Controllers are normal Ruby classes that inherit from ActionController:Base or more frequently the generated ApplicationController Class
Controllers have public action methods that can be called from the dispatcher as well as their own protected and private methods. Typically, action methods follow this pattern :-
- Manipulate the domain model in some way
- Refers to the response format requested by the user
- Generate a response in the correct form by rendering a view template
script/generate controller Concepts
exists app/controllers/
exists app/helpers/
create app/views/concepts
exists test/functional/
exists test/unit/helpers/
create app/controllers/concepts_controller.rb
create test/functional/concepts_controller_test.rb
create app/helpers/concepts_helper.rb
create test/unit/helpers/concepts_helper_test.rb
As such, you should remove all Business Logic from your Controllers and put in the corresponding Model.
So what does the Controllers in your Rails application do ?
Well, your controllers are only responsible for mapping between URLs, co-ordinating with your Models and your Views and channeling back to a HTTP response. In addition, it may do Access Control as well.
Basically, when someone connects to your Rails Application via an URL, they are ly asking your Application to execute a Controller Action. Typically, action methods follow this pattern :-
- Interact with the domain model in some way such as selecting, inserting or updating data based on incoming parameters or using one or more classes form the app/model directory
- Generate a response by rendering a view template with the same name as the action method
As you may be aware, Rails works magically so long as you adhere to the all important concepl of Convention over Configuration. In this respect Controller Conventions include :-
a) The Controller's class name should be camel cased and pluralised and be followed by the word controller. eg.CustomersControllers or BillNosControllers
b) Similar to Models, the controller filename should be lowercased and underscored versions of the class name. eg. customers_controllers.rb or bill_nos_controllers.rb
c) An action is a Public Method of a controller class. For example
- index
- show
- new
- create
- edit
- update
- destroy
What is fascinating is that unless explicitly told to do , Rails will render the views with the same name as the actions!
How to remove a controller and all previously generated files ?
chee@ibm4linux:~/workspace/crm2009$ script/destroy controller concepts
rm test/unit/helpers/concepts_helper_test.rb
rm app/helpers/concepts_helper.rb
rm test/functional/concepts_controller_test.rb
rm app/controllers/concepts_controller.rb
notempty test/unit/helpers
notempty test/unit
notempty test
notempty test/functional
notempty test
rmdir app/views/concepts
notempty app/views
notempty app
notempty app/helpers
notempty app
notempty app/controllers
notempty app
chee@ibm4linux:~/workspace/crm2009$
Sunday, August 23, 2009
Rails IDE : Installing Aptana Radrails 1.30 into Eclipse Galileo
For Radrail users who would like to use it within Eclipse Galileo, you may want to follow this simple tutorial :-
1. Download Eclipse 3.50 aka Galileo
2. Launch Eclipse
3. Click Help/Install Software
4. Install Aptana Studio 1.5 as a plug into Eclipse


5. Install Aptana Radrails via Aptana Studio


6. Open Aptana Radrails Perspective via Windows/Open Perspective/Others

7. After opening a Rails Project

1. Download Eclipse 3.50 aka Galileo
2. Launch Eclipse
3. Click Help/Install Software
4. Install Aptana Studio 1.5 as a plug into Eclipse


5. Install Aptana Radrails via Aptana Studio


6. Open Aptana Radrails Perspective via Windows/Open Perspective/Others

7. After opening a Rails Project

Migration : Migrating an Application from Rails 1.2.5 to Rails 2.3.3
Since Nov 2007, I had a Rails 1.2 e-CRM application running on Windows Server 2003 and powered by Apache 2 and a pack of Mongrels web servers.
A couple of weeks ago, I discovered Ubuntu 9.04 and decided to migrate the e-CRM to Rails 2.3.3 running on Ubuntu 9.04.
What have I achieved thus far ?
1. Installing Rails 2.3.3 on Ubuntu 9.04
2. Installing Mongrel, Capistrano, Passenger and Apache on Ubuntu 9.04.
3. Installing Aptana Radrails on Ubuntu 9.04
4. Since Aptana Radrails was slow, I then installed Eclipse Ganymade (3.4.2) and managed to install the latest Aptana Radrails .1.30 as a plugin to Eclipse
When I attempted to run e-CRM on Rails 1.2, I ran into a number of incompatibilities including the need to update the following Rails Plugins
1. active_scaffold
2. active_scaffold_export
3. active_scaffold_tools (still unable to get a version compatible with Rails 2.3.3)
4. role_requirement
5. use restful_authentication instead of acts_as_authenticated
6. record_select
7. acts_as_audited
Then after wasting a couple of days, I discovered that Ubunti 9.04 being a Linux distro is case-sensitive and I had to pay attention to renaming the images files in the public\images folder.
Also, I used this script (command line) to auto-convert my rhtml files to html.erb as recommended for Rails 2.x
for f in $(find . -name '*.rhtml') ; do c=$(dirname $f)/$(basename $f .rhtml).html.erb ; mv $f $c ; done
Why the need to change rhtml to html.erb ?
Apparently in Rails 2.x, it’s been revealed that the
Why such a change – well,
FYI, the ‘old’ extensions won’t be fully deprecated until Rails 3.0.
BTW, this site was also useful reference in my quest to upgrade from Rails 1.2 to 2.3.3
Some additional plugins needed by active_scaffold include
a) in_place_editing - git://github.com/rails/in_place_editing.git
b) render_component
More to come...
A couple of weeks ago, I discovered Ubuntu 9.04 and decided to migrate the e-CRM to Rails 2.3.3 running on Ubuntu 9.04.
What have I achieved thus far ?
1. Installing Rails 2.3.3 on Ubuntu 9.04
2. Installing Mongrel, Capistrano, Passenger and Apache on Ubuntu 9.04.
3. Installing Aptana Radrails on Ubuntu 9.04
4. Since Aptana Radrails was slow, I then installed Eclipse Ganymade (3.4.2) and managed to install the latest Aptana Radrails .1.30 as a plugin to Eclipse
When I attempted to run e-CRM on Rails 1.2, I ran into a number of incompatibilities including the need to update the following Rails Plugins
1. active_scaffold
2. active_scaffold_export
3. active_scaffold_tools (still unable to get a version compatible with Rails 2.3.3)
4. role_requirement
5. use restful_authentication instead of acts_as_authenticated
6. record_select
7. acts_as_audited
Then after wasting a couple of days, I discovered that Ubunti 9.04 being a Linux distro is case-sensitive and I had to pay attention to renaming the images files in the public\images folder.
Also, I used this script (command line) to auto-convert my rhtml files to html.erb as recommended for Rails 2.x
for f in $(find . -name '*.rhtml') ; do c=$(dirname $f)/$(basename $f .rhtml).html.erb ; mv $f $c ; done
Why the need to change rhtml to html.erb ?
Apparently in Rails 2.x, it’s been revealed that the
.rhtml and .rxml file extensions will be deprecated in favor of .erb and .builder, respectively.Why such a change – well,
.rhtml files are not strictly html files. They are generic embedded ruby files that can be used for email templates, csv files, vcards etc… .erb is just a more generic, accurate extension for the file type. The same goes for .rxml – it can be used for more than just xml files. Think of all the rss feeds you’ve written with rxml files. Now you can stop being tied down by the limited .rxml file extension and can start using .builder.FYI, the ‘old’ extensions won’t be fully deprecated until Rails 3.0.
BTW, this site was also useful reference in my quest to upgrade from Rails 1.2 to 2.3.3
Some additional plugins needed by active_scaffold include
a) in_place_editing - git://github.com/rails/in_place_editing.git
b) render_component
More to come...
Saturday, August 22, 2009
Rails IDE: Can Radrails be installed into Eclipse ? {Updated 30th August 2009]
I would answer Yes and No this question :-)
Yes, you can install Radrails directly to Eclipse (I use Eclipse Ganymade aka 3.4.2) but you ended up with the obsolete 0.72 version :-(
To install the latest 1.30 developed by Aptana and known as Aptana radrails, I was forced to install Aptana Studio and then Install Aptana Radrails
Still, the effort was worth it as the loading time for Eclipse Ganymade SDK version + Aptana Radrails loads much faster and runs faster than Aptana 1.51 Studio + Aptana Radrails.
BTW, take a look at my actual experience in installing Aptana Radrails into Eclipse Galileo aka 3.50
Yes, you can install Radrails directly to Eclipse (I use Eclipse Ganymade aka 3.4.2) but you ended up with the obsolete 0.72 version :-(
To install the latest 1.30 developed by Aptana and known as Aptana radrails, I was forced to install Aptana Studio and then Install Aptana Radrails
Still, the effort was worth it as the loading time for Eclipse Ganymade SDK version + Aptana Radrails loads much faster and runs faster than Aptana 1.51 Studio + Aptana Radrails.
BTW, take a look at my actual experience in installing Aptana Radrails into Eclipse Galileo aka 3.50
Wednesday, August 19, 2009
Advanced Rails : How do you create a New Database from schema.db ?
1. Select your Project
2. Edit config\database.yml
development:
database: SourceDatabaseName
3. Delete schema.db
4. Right-click and select Rake\db\schema\load which basically the same as typing into the Rails Shell
5. Edit config\database.yml
development:
database: ProjectDatabaseName
Nb. Assume that you had already create an empty database for your project
6. rake db:schema:load
That's it, when you check your project database, it is already populated with the Source Schema.
2. Edit config\database.yml
development:
database: SourceDatabaseName
3. Delete schema.db
4. Right-click and select Rake\db\schema\load which basically the same as typing into the Rails Shell
5. Edit config\database.yml
development:
database: ProjectDatabaseName
Nb. Assume that you had already create an empty database for your project
6. rake db:schema:load
That's it, when you check your project database, it is already populated with the Source Schema.
Tuesday, August 18, 2009
Rails IDE: Programming a Rails Project Using Aptana Radrails (Updated 11th Jan 2017)
Update on 11/1/17 : Aptana Rdrails does not work with Rails 5
Here are the steps that I took when programming a RoR project using Aptana Rails 1.5 on Ubuntu 9.04
1. Use MySQL Administrator to create a new database crm2009
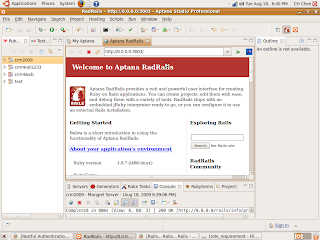
2. Use Aptana Radrails(defaulted to Radrails perspective) to create new project via
a) File
b) New
c) Rails Project
and the standard Rail Page was launched apparently without any error
d) Checked Console and found the folowing error message
/!\ FAILSAFE /!\ Tue Aug 18 18:03:01 +0800 2009
Status: 500 Internal Server Error
Access denied for user 'root'@'localhost' (using password: NO)
3. Edited config\database.yml to put in mysql password and the problem went away
Installing Rails Plugin
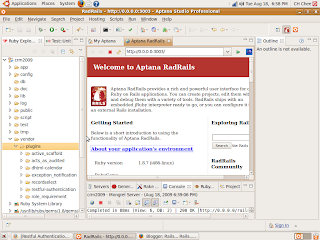
The problem with Aptana Radrails is that being Eclippse 3.2-based, it does not support installing from the github although using the Rails Plugin Tab works with svn. Worst still, using console script/plugin install also does not work :-(
So what's the workaround ?
Opening a Terminal Window, i was force to type
git clone to download to
crm2009\vendor\plugins
In this manner, I installed restul_authentication,role_requirement,acts_as_audited,active_scaffold etc
Then, I selected vendor\plugins and right-clicked to Refresh and the desired plugins are now in the Ruby Explorer
Installing restful_authentication
a) Select Generate Tab
b) Select authenticated
c)Type user session in parameters
d) Click OK
In the Console, we can see this
script/generate authenticated user sessions
Ready to generate.
----------------------------------------------------------------------
Once finished, don't forget to:
- Add routes to these resources. In config/routes.rb, insert routes like:
map.signup '/signup', :controller => 'users', :action => 'new'
map.login '/login', :controller => 'sessions', :action => 'new'
map.logout '/logout', :controller => 'sessions', :action => 'destroy'
----------------------------------------------------------------------
We've create a new site key in config/initializers/site_keys.rb. If you have existing
user accounts their passwords will no longer work (see README). As always,
keep this file safe but don't post it in public.
----------------------------------------------------------------------
exists app/models/
exists app/controllers/
exists app/controllers/
exists app/helpers/
create app/views/sessions
exists app/controllers/
exists app/helpers/
create app/views/users
exists config/initializers
exists test/functional/
exists test/functional/
exists test/unit/
exists test/fixtures/
create app/models/user.rb
create app/controllers/sessions_controller.rb
create app/controllers/users_controller.rb
create lib/authenticated_system.rb
create lib/authenticated_test_helper.rb
create config/initializers/site_keys.rb
create test/functional/sessions_controller_test.rb
create test/functional/users_controller_test.rb
create test/unit/user_test.rb
create test/fixtures/users.yml
create app/helpers/sessions_helper.rb
create app/helpers/users_helper.rb
create app/views/sessions/new.html.erb
create app/views/users/new.html.erb
create app/views/users/_user_bar.html.erb
create db/migrate
create db/migrate/20090818114130_create_users.rb
route map.resource :session
route map.resources :users
route map.signup '/signup', :controller => 'users', :action => 'new'
route map.register '/register', :controller => 'users', :action => 'create'
route map.login '/login', :controller => 'sessions', :action => 'new'
route map.logout '/logout', :controller => 'sessions', :action => 'destroy'
>
Then, select db/migrate/yymmddhhmmss_create_users.rb
Right-click, select Rake/db/migrate and hit enter an in the Rails Console
rake db:migrate
== CreateUsers: migrating ====================================================
-- create_table("users", {:force=>true})
-> 0.0108s
-- add_index(:users, :login, {:unique=>true})
-> 0.0122s
== CreateUsers: migrated (0.0246s) ===========================================
>
script/generate mailer user
exists app/models/
create app/views/user
exists test/unit/
create test/fixtures/user
overwrite app/models/user.rb? (enter "h" for help) [Ynaqdh] Y
force app/models/user.rb
overwrite test/unit/user_test.rb? (enter "h" for help) [Ynaqdh] Y
force test/unit/user_test.rb
Installing role_requirement
script/generate roles Role User
Generating Role against User
Added the following to the top of app/models/user.rb:
# ---------------------------------------
# The following code has been generated by role_requirement.
# You may wish to modify it to suit your need
has_and_belongs_to_many :roles
# has_role? simply needs to return true or false whether a user has a role or not.
# It may be a good idea to have "admin" roles return true always
def has_role?(role_in_question)
@_list ||= self.roles.collect(&:name)
return true if @_list.include?("admin")
(@_list.include?(role_in_question.to_s) )
end
# ---------------------------------------
Added ApplicationController include to /home/chee/Aptana Studio Workspace/crm2009/app/controllers/application_controller.rb
Added RoleRequirement include to /home/chee/Aptana Studio Workspace/crm2009/app/controllers/application_controller.rb
create test/fixtures/roles.yml
create app/models/role.rb
create lib/role_requirement_system.rb
create lib/role_requirement_test_helper.rb
create lib/hijacker.rb
exists db/migrate
create db/migrate/20090818131928_create_roles.rb
>
Right-click, select Rake/db/migrate and hit enter an in the Rails Console
rake db:migrate
== CreateRoles: migrating ====================================================
-- create_table("roles")
-> 0.0652s
-- create_table("roles_users", {:id=>false})
-> 0.0066s
-- add_index("roles_users", "role_id")
-> 0.0123s
-- add_index("roles_users", "user_id")
-> 0.0486s
== CreateRoles: migrated (0.1342s) ===========================================
>
More to come...
Here are the steps that I took when programming a RoR project using Aptana Rails 1.5 on Ubuntu 9.04
1. Use MySQL Administrator to create a new database crm2009
2. Use Aptana Radrails(defaulted to Radrails perspective) to create new project via
a) File
b) New
c) Rails Project
and the standard Rail Page was launched apparently without any error
d) Checked Console and found the folowing error message
/!\ FAILSAFE /!\ Tue Aug 18 18:03:01 +0800 2009
Status: 500 Internal Server Error
Access denied for user 'root'@'localhost' (using password: NO)
3. Edited config\database.yml to put in mysql password and the problem went away

Installing Rails Plugin
The problem with Aptana Radrails is that being Eclippse 3.2-based, it does not support installing from the github although using the Rails Plugin Tab works with svn. Worst still, using console script/plugin install
So what's the workaround ?
Opening a Terminal Window, i was force to type
git clone
crm2009\vendor\plugins
In this manner, I installed restul_authentication,role_requirement,acts_as_audited,active_scaffold etc
Then, I selected vendor\plugins and right-clicked to Refresh and the desired plugins are now in the Ruby Explorer

a) Select Generate Tab
b) Select authenticated
c)Type user session in parameters
d) Click OK
In the Console, we can see this
script/generate authenticated user sessions
Ready to generate.
----------------------------------------------------------------------
Once finished, don't forget to:
- Add routes to these resources. In config/routes.rb, insert routes like:
map.signup '/signup', :controller => 'users', :action => 'new'
map.login '/login', :controller => 'sessions', :action => 'new'
map.logout '/logout', :controller => 'sessions', :action => 'destroy'
----------------------------------------------------------------------
We've create a new site key in config/initializers/site_keys.rb. If you have existing
user accounts their passwords will no longer work (see README). As always,
keep this file safe but don't post it in public.
----------------------------------------------------------------------
exists app/models/
exists app/controllers/
exists app/controllers/
exists app/helpers/
create app/views/sessions
exists app/controllers/
exists app/helpers/
create app/views/users
exists config/initializers
exists test/functional/
exists test/functional/
exists test/unit/
exists test/fixtures/
create app/models/user.rb
create app/controllers/sessions_controller.rb
create app/controllers/users_controller.rb
create lib/authenticated_system.rb
create lib/authenticated_test_helper.rb
create config/initializers/site_keys.rb
create test/functional/sessions_controller_test.rb
create test/functional/users_controller_test.rb
create test/unit/user_test.rb
create test/fixtures/users.yml
create app/helpers/sessions_helper.rb
create app/helpers/users_helper.rb
create app/views/sessions/new.html.erb
create app/views/users/new.html.erb
create app/views/users/_user_bar.html.erb
create db/migrate
create db/migrate/20090818114130_create_users.rb
route map.resource :session
route map.resources :users
route map.signup '/signup', :controller => 'users', :action => 'new'
route map.register '/register', :controller => 'users', :action => 'create'
route map.login '/login', :controller => 'sessions', :action => 'new'
route map.logout '/logout', :controller => 'sessions', :action => 'destroy'
>
Then, select db/migrate/yymmddhhmmss_create_users.rb
Right-click, select Rake/db/migrate and hit enter an in the Rails Console
rake db:migrate
== CreateUsers: migrating ====================================================
-- create_table("users", {:force=>true})
-> 0.0108s
-- add_index(:users, :login, {:unique=>true})
-> 0.0122s
== CreateUsers: migrated (0.0246s) ===========================================
>
script/generate mailer user
exists app/models/
create app/views/user
exists test/unit/
create test/fixtures/user
overwrite app/models/user.rb? (enter "h" for help) [Ynaqdh] Y
force app/models/user.rb
overwrite test/unit/user_test.rb? (enter "h" for help) [Ynaqdh] Y
force test/unit/user_test.rb
Installing role_requirement
script/generate roles Role User
Generating Role against User
Added the following to the top of app/models/user.rb:
# ---------------------------------------
# The following code has been generated by role_requirement.
# You may wish to modify it to suit your need
has_and_belongs_to_many :roles
# has_role? simply needs to return true or false whether a user has a role or not.
# It may be a good idea to have "admin" roles return true always
def has_role?(role_in_question)
@_list ||= self.roles.collect(&:name)
return true if @_list.include?("admin")
(@_list.include?(role_in_question.to_s) )
end
# ---------------------------------------
Added ApplicationController include to /home/chee/Aptana Studio Workspace/crm2009/app/controllers/application_controller.rb
Added RoleRequirement include to /home/chee/Aptana Studio Workspace/crm2009/app/controllers/application_controller.rb
create test/fixtures/roles.yml
create app/models/role.rb
create lib/role_requirement_system.rb
create lib/role_requirement_test_helper.rb
create lib/hijacker.rb
exists db/migrate
create db/migrate/20090818131928_create_roles.rb
>
Right-click, select Rake/db/migrate and hit enter an in the Rails Console
== CreateRoles: migrating ====================================================
-- create_table("roles")
-> 0.0652s
-- create_table("roles_users", {:id=>false})
-> 0.0066s
-- add_index("roles_users", "role_id")
-> 0.0123s
-- add_index("roles_users", "user_id")
-> 0.0486s
== CreateRoles: migrated (0.1342s) ===========================================
>
More to come...
Monday, August 17, 2009
Ubuntu 9.04 : How to Clone a Remote git Repository ?
What I did was :-
1. Installed git in Ubuntu 8.04
2. Launch a Terminal Window
3. cd to MyRailsProject\vendor\plugins
4. clone git http://github.com/activescaffld/active_scaffold.git
1. Installed git in Ubuntu 8.04
2. Launch a Terminal Window
3. cd to MyRailsProject\vendor\plugins
4. clone git http://github.com/activescaffld/active_scaffold.git
Sunday, August 16, 2009
Rails IDE : How to Install a Plugin in Aptana RadRails Professional ?
My last project using RoR was completed in Nov 2007 on a Windows 2003 Server and it has been functioning perfectly 24x7x365 till todate
Having installed Ubuntu 9.04 on a dated IBM R40e (1G RAM & 75G HDD), I had earlier
a) Installed Ruby on Rails
b) Installed Aptana Studio 1.5 (based on Eclipse 3.2) and found that it needed Sun JRE
c) Installed Sun JRE via Ubuntu's Terminal
d) Installed the RADRails Plugin into Aptana Studio 1.5
e) I then defaulted Aptana Studio to the RadRails Perspective
Since ActiveScaffold was intensively used, I naturally downloaded it and was at a loss as how to install it :-( Then, I remembered that there was a Plugins Tab which should be visible but it wasn;t there :-(
With a bit of exploring Aptana, I click Window/Show View and clicked Rails Plugin and bingo, the Rails Plugin Tab became visible. It was a breeze after that :-(
Having installed Ubuntu 9.04 on a dated IBM R40e (1G RAM & 75G HDD), I had earlier
a) Installed Ruby on Rails
b) Installed Aptana Studio 1.5 (based on Eclipse 3.2) and found that it needed Sun JRE
c) Installed Sun JRE via Ubuntu's Terminal
d) Installed the RADRails Plugin into Aptana Studio 1.5
e) I then defaulted Aptana Studio to the RadRails Perspective
Since ActiveScaffold was intensively used, I naturally downloaded it and was at a loss as how to install it :-( Then, I remembered that there was a Plugins Tab which should be visible but it wasn;t there :-(
With a bit of exploring Aptana, I click Window/Show View and clicked Rails Plugin and bingo, the Rails Plugin Tab became visible. It was a breeze after that :-(
Saturday, August 15, 2009
Ubuntu 9.04 : How to Install Ruby on Rails 2.3.3 [15th August 2009]
CCH : These are the steps that I took to install Ruby on Rails to an IBM Thinkpad with 1G RAM and a 75G Hard Disk and installed with Ubuntu 9.04.
Ruby installation
Firstly, I clicked Applications/Accessories/Terminal to launch the Terminal and typed the following command to update the repositories.sudo apt-get update
sudo apt-get dist-upgrade
On succesful updating, I started to install Rails.
sudo apt-get install ruby ri rdoc irb libopenssl-ruby ruby-dev
Note : Rails prerequisites include :-
ruby = An interpreter of object-oriented scripting language Ruby
ri = Ruby Interactive reference
rdoc = Generate documentation from ruby source files
irb = Interactive Ruby
Ruby Gem installation
Next, I started to install the Ruby gem package manager by firstly downloading ad the latest Ruby gems .35 via the following link.http://rubyforge.org/projects/rubygems/
Download and extract the files.
tar xvzf rubygems-1.3.5.tgz
cd rubygems-1.3.5
sudo ruby setup.rb
cd rubygems-1.3.5
sudo ruby setup.rb
I then deleted the .tgz file and rubygems directory.
cd ..
rm -r rubygems-1.3.5 rubygems-1.3.5.tgz
rm -r rubygems-1.3.5 rubygems-1.3.5.tgz
Next, I set out to create a set of simlinks. Otherwise it will be a tedious task to type commands with the version (1.8). For an example if we need to call the gem command we’ve to type gem1.8.
sudo ln -s /usr/bin/gem1.8 /usr/local/bin/gem
sudo ln -s /usr/bin/ruby1.8 /usr/local/bin/ruby
sudo ln -s /usr/bin/rdoc1.8 /usr/local/bin/rdoc
sudo ln -s /usr/bin/ri1.8 /usr/local/bin/ri
sudo ln -s /usr/bin/irb1.8 /usr/local/bin/irb
sudo ln -s /usr/bin/ruby1.8 /usr/local/bin/ruby
sudo ln -s /usr/bin/rdoc1.8 /usr/local/bin/rdoc
sudo ln -s /usr/bin/ri1.8 /usr/local/bin/ri
sudo ln -s /usr/bin/irb1.8 /usr/local/bin/irb
Rails Installation
I then installed Rails using gem.sudo gem install rails
Server Installation
FYI, Rails by default comes with the WEBrick server. But like most Rails developers, I prefer the Mongrel server and typed the following command to install Mongrel server as well as passenger 2.2.4 and capistrano 2.5.8 for deployemnt purposessudo gem install mongrel passenger capistrano
sudo apt-get install ruby-dev
Rails 2.3 shipped with SQLite3 as it’s default database instead of MySQL. You can install SQLite3 libraries by following commands.
sudo apt-get install sqlite3 swig libsqlite3-ruby libsqlite3-dev
sudo gem install sqlite3-ruby
sudo gem install sqlite3-ruby
sudo apt-get install mysql-client libmysqlclient15-dev
sudo gem install mysql
sudo gem install mysql
Create Ruby on Rails App
With no error mesages, I proceeded to create a new Ruby on Rail application by following command :-rails test_app
rails test-app -d mysql
Run the app
cd test_app
script/server
script/server
and bingo I succeeded in launching my first RoR apps on Ubuntu :-)
Ubuntu 9.04 : How to use the Terminal ?
Finally, after my last foray (in 2007) into developing RoR applications in Windows, I finally decided to do so in Linux.
Would you believe it, it took a retiree who loves to try out new operating systems to convince me to try out Ubuntu 9.04 ? He actually prefers Mandriva Spring 2009 :-)
So using my usual modus operandi, I googled for 'How to install ruby and ruby on rails on ubuntu 9.04" and got http://mohamedaslam.com/install-ruby-on-rails-on-ubuntu-904-jaunty-jacklope/
Let's see what are the steps
Er... what's sudo and more importantly where do I type it ?
Did a further search and came across something called the Terminal and landed on https://help.ubuntu.com/community/UsingTheTerminal
which says :-
 man command, info command and command --help are the most important tools at the command line.
Would you believe it, it took a retiree who loves to try out new operating systems to convince me to try out Ubuntu 9.04 ? He actually prefers Mandriva Spring 2009 :-)
So using my usual modus operandi, I googled for 'How to install ruby and ruby on rails on ubuntu 9.04" and got http://mohamedaslam.com/install-ruby-on-rails-on-ubuntu-904-jaunty-jacklope/
Let's see what are the steps
Ruby installation
First we need to update the repositories.sudo apt-get update
Er... what's sudo and more importantly where do I type it ?
Did a further search and came across something called the Terminal and landed on https://help.ubuntu.com/community/UsingTheTerminal
which says :-
"Under Linux there are GUIs (graphical user interfaces), where you can point and click and drag, and hopefully get work done without first reading lots of documentation. The traditional Unix environment is a CLI (command line interface), where you type commands to tell the computer what to do. That is faster and more powerful, but requires finding out what the commands are."
-- from man intro(1)
-- from man intro(1)
For some tasks, especially things like system configuration, it makes sense to use the terminal, and you'll probably have seen instructions on help pages or forums similar to:
sudo gobbledegook blah_blah -w -t -f aWkward/ComBinationOf/mixedCase/underscores_strokes/and.dots
It is often assumed that you know how to use the terminal - and anyone can manage typing and backspacing. But there are some crafty shortcuts which can make your life a lot easier:
- How to move around in a terminal window and edit the text that you type there.
- Some Linux commands for basic tasks.
- Different ways to open a terminal, how to work with multiple terminals, etc.
Using this page
- This page will help familiarize you with basic GNU/Linux shell commands.
- It is not intended to be a complete guide to the command line, just an introduction to complement Ubuntu's graphical tools.
All command names will be in bold.
Commands needing to be typed will be in "bold with quotes".- All of the commands on this page are to be issued from a command prompt in a terminal.
Note that the terminal is case sensitive. User, user, and USER are all different to Linux.
Starting a Terminal
In Gnome (Ubuntu)
The terminal can be found at Applications menu -> Accessories -> Terminal.
In Xfce (Xubuntu)
The terminal can be found at Applications menu -> System -> Terminal.
In KDE (Kubuntu)
The terminal can be found at KMenu -> System -> Terminal Program (Konsole).
Commands
sudo: Executing Commands with Elevated Privileges
Most of the following commands will need to be prefaced with the sudo command if you will be working with directories or files not owned by your account. This is a special command which temporarily gives you access to change computer settings. The terminal will ask you for your password. Please see RootSudo for information on using sudo.
File & Directory Commands
pwd: The pwd command will allow you to know in which directory you're located (pwd stands for "print working directory"). Example: "pwd" in the Desktop directory will show "~/Desktop". Note that the Gnome Terminal also displays this information in the title bar of its window.
ls: The ls command will show you the files in your current directory. Used with certain options, you can see sizes of files, when files were made, and permissions of files. Example: "ls ~" will show you the files that are in your home directory.
cd: The cd command will allow you to change directories. When you open a terminal you will be in your home directory. To move around the file system you will use cd. Examples:
To navigate into the root directory, use "cd /"
To navigate to your home directory, use "cd" or "cd ~"
To navigate up one directory level, use "cd .."
To navigate to the previous directory (or back), use "cd -"
To navigate through multiple levels of directory at once, specify the full directory path that you want to go to. For example, use, "cd /var/www" to go directly to the /www subdirectory of /var/. As another example, "cd ~/Desktop" will move you to the Desktop subdirectory inside your home directory.
cp: The cp command will make a copy of a file for you. Example: "cp file foo" will make a exact copy of "file" and name it "foo", but the file "file" will still be there. If you are copying a directory, you must use "cp -r directory foo" (copy recursively).
mv: The mv command will move a file to a different location or will rename a file. Examples are as follows: "mv file foo" will rename the file "file" to "foo". "mv foo ~/Desktop" will move the file "foo" to your Desktop directory but will not rename it. You must specify a new file name to rename a file.- To save on typing, you can substitute '~' in place of the home directory.
Note that if you are using mv with sudo you can use the ~ shortcut, because the terminal expands the ~ to your home directory. However, when you open a root shell with sudo -i or sudo -s, ~ will refer to the root account's home directory, not your own.
rm: Use this command to remove or delete a file in your directory.
rmdir: The rmdir command will delete an empty directory. To delete a directory and all of its contents recursively, use rm -r instead.
mkdir: The mkdir command will allow you to create directories. Example: "mkdir music" will create a directory called "music".
man: The man command is used to show you the manual of other commands. Try "man man" to get the man page for man itself. See the "Man & Getting Help" section down the page for more information.
System Information Commands
df: The df command displays filesystem disk space usage for all mounted partitions. "df -h" is probably the most useful - it uses megabytes (M) and gigabytes (G) instead of blocks to report. (-h means "human-readable")
du: The du command displays the disk usage for a directory. It can either display the space used for all subdirectories or the total for the directory you run it on. Example:
user@users-desktop:~$ du /media/floppy
1032    /media/floppy/files
1036    /media/floppy/
user@users-desktop:~$ du -sh /media/floppy
1.1M    /media/floppy/
-s means "Summary" and -h means "Human Readable"
free: The free command displays the amount of free and used memory in the system. "free -m" will give the information using megabytes, which is probably most useful for current computers.
top: The top command displays information on your Linux system, running processes and system resources, including CPU, RAM & swap usage and total number of tasks being run. To exit top, press "q".
uname -a: The uname command with the -a option prints all system information, including machine name, kernel name & version, and a few other details. Most useful for checking which kernel you're using.
lsb_release -a: The lsb_release command with the -a option prints version information for the Linux release you're running, for example:
user@computer:~$ lsb_release -a
No LSB modules are available.
Distributor ID: Ubuntu
Description:    Ubuntu 6.06 LTS
Release:        6.06
Codename:       dapper
ifconfig reports on your system's network interfaces.
Adding A New User
"adduser newuser" command will create a new general user called "newuser" on your system, and to assign a password for the newuser account use "passwd newuser".
Options
The default behaviour for a command may usually be modified by adding a --option to the command. The ls command for example has an -s option so that "ls -s" will include file sizes in the listing. There is also a -h option to get those sizes in a "human readable" format.
Options can be grouped in clusters so "ls -sh" is exactly the same command as "ls -s -h". Most options have a long version, prefixed with two dashes instead of one, so even "ls --size --human-readable" is the same command.
"Man" and getting help
man command, info command and command --help are the most important tools at the command line. Nearly every command and application in Linux will have a man (manual) file, so finding them is as simple as typing "man "command"" to bring up a longer manual entry for the specified command. For example, "man mv" will bring up the mv (Move) manual.
Move up and down the man file with the arrow keys, and quit back to the command prompt with "q".
"man man" will bring up the manual entry for the man command, which is a good place to start!
"man intro" is especially useful - it displays the "Introduction to user commands" which is a well-written, fairly brief introduction to the Linux command line.
There are also info pages, which are generally more in-depth than man pages. Try "info info" for the introduction to info pages.
Some software developers prefer info to man (for instance, GNU developers), so if you find a very widely used command or app that doesn't have a man page, it's worth checking for an info page.
Virtually all commands understand the -h (or --help) option which will produce a short usage description of the command and it's options, then exit back to the command prompt. Try "man -h" or "man --help" to see this in action.
Caveat: It's possible (but rare) that a program doesn't understand the -h option to mean help. For this reason, check for a man or info page first, and try the long option --help before -h.
Searching for man files
If you aren't sure which command or application you need to use, you can try searching the man files.
man -k foo will search the man files for foo. Try "man -k nautilus" to see how this works.
Note that this is the same as doing apropos command.
man -f foo searches only the titles of your system's man files. Try "man -f gnome", for example.
Note that this is the same as doing whatis command.
Other Useful Things
Prettier Manual Pages
Users who have Konqueror installed will be pleased to find they can read and search man pages in a web browser context, prettified with their chosen desktop fonts and a little colour, by visiting man:/command in Konqueror's address bar. Some people might find this lightens the load if there's lots of documentation to read/search.
Pasting in commands
Often, you will be referred to instructions that require commands to be pasted into the terminal. You might be wondering why the text you've copied from a web page using ctrl+C won't paste in with ctrl+V. Surely you don't have to type in all those nasty commands and filenames? Relax. Middle Button Click on your mouse (both buttons simultaneously on a two-button mouse) or Right Click and select Paste from the menu.
Save on typing
Up Arrow or ctrl+p | Scrolls through the commands you've entered previously. | |
Down Arrow or ctrl+n | Takes you back to a more recent command. | |
Enter | When you have the command you want. | |
tab | A very useful feature. It autocompletes any commands or filenames, if there's only one option, or else gives you a list of options. | |
ctrl+r | Searches for commands you've already typed. When you have entered a very long, complex command and need to repeat it, using this key combination and then typing a portion of the command will search through your command history. When you find it, simply press Enter. | |
History | The history command shows a very long list of commands that you have typed. Each command is displayed next to a number. You can type !x to execute a previously typed command from the list (replace the X with a number). If you history output is too long, then use history | less for a scrollable list. | |
Change the text
The mouse won't work. Use the Left/Right arrow keys to move around the line.
When the cursor is where you want it in the line, typing inserts text - ie it doesn't overtype what's already there.
ctrl+a or Home | Moves the cursor to the start of a line. | |
ctrl+e or End | Moves the cursor to the end of a line. | |
ctrl+b | Moves to the beginning of the previous or current word. | |
ctrl+k | Deletes from the current cursor position to the end of the line. | |
ctrl+u | Deletes the whole of the current line. | |
ctrl+w | Deletes the word before the cursor. | |
More ways to run a terminal
You can also get it with a function key
You can run more than one - in tabs or separate windows
More Information
AptGetHowto - using apt-get to install packages from the command line.
Commandline Repository Editing - adding the Universe/Multiverse repositories through the command line.
grep Howto - grep is a powerful command line search tool.
find Howto - locate files on the command line.
CommandlineHowto - longer and more complete than this basic guide, but still unfinished.
HowToReadline - information on some more advanced customization for the command line.
For more detailed tutorials on the Linux command line, please see:
http://linuxcommand.org/ - basic BASH tutorials, including BASH scripting
http://linuxsurvival.com/index.php - Java-based tutorials
http://rute.2038bug.com/index.html.gz - a massive online book about system administration, almost all from the command line.
http://www.ss64.com/bash/ - a good list a commands.
Saturday, November 10, 2007
Announcements : Rails 2.0 Release Candidate 1
Looks as if Rails 2.0 will be released soon if this post by DHH (creator of Rails) today at the Ruby on Rails : Talk Google Group is any indication :-
We're almost there. Really this time.
http://weblog.rubyonrails.org/2007/11/9/rails-2-0-release-candidate-1
BTW, the basic advice is to upgrade to 1.2.5 and get rid of all deprecation warnings.
We're almost there. Really this time.
http://weblog.rubyonrails.org/2007/11/9/rails-2-0-release-candidate-1
BTW, the basic advice is to upgrade to 1.2.5 and get rid of all deprecation warnings.
Subscribe to:
Posts (Atom)